
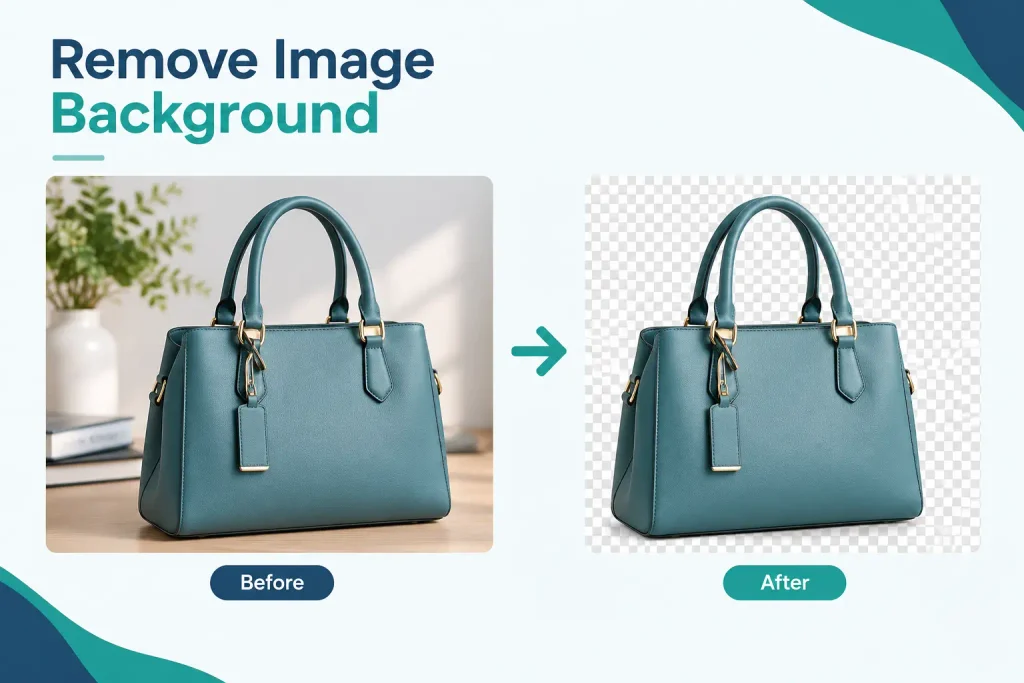
You have a photo with a background that doesn’t belong, and you need it gone. Maybe it is a product shot with a cluttered wall behind it, a portrait with a busy street in the frame, or a logo that still shows a white box around it. Removing an image background means separating the main subject from everything behind it so you can place it on a new background, a solid color, or a PNG with no background.
This guide walks through what background removal actually does, the methods available (online tools, AI, manual editing, and professional services), how to handle tricky details like hair and shadows, and how to check that the final image is actually ready to use.
What Does It Mean to Remove an Image Background?
Removing a background means identifying the subject in a photo (a product, a person, an object) and separating it from the rest of the image. Once separated, you can delete the area behind the subject, replace it with a new scene, or fill it with a plain color.
The result is usually saved as an image cutout, meaning the subject stands alone with the unwanted area gone. When that empty area is saved to display as empty rather than white or black, the file is often exported as a PNG, since PNG can preserve an image with the background removed. This differs from simply cropping a photo, which only trims the edges without affecting what is behind the subject.
Why Remove a Background From an Image?
People remove backgrounds for practical, everyday reasons. Common use cases include:
- Ecommerce product photos that need a clean, consistent look across a catalog
- Website images that need to match a page’s design without a distracting background
- Marketing materials such as banners, flyers, and email graphics
- Social media graphics where a subject needs to sit on a branded background
- Profile photos and headshots used across multiple platforms
- Product listings on marketplaces that require specific background rules
- Presentations where a product or person needs to stand out on a slide
In most of these cases, the goal is not artistic. It is practical: the subject needs to look consistent wherever it is placed next.
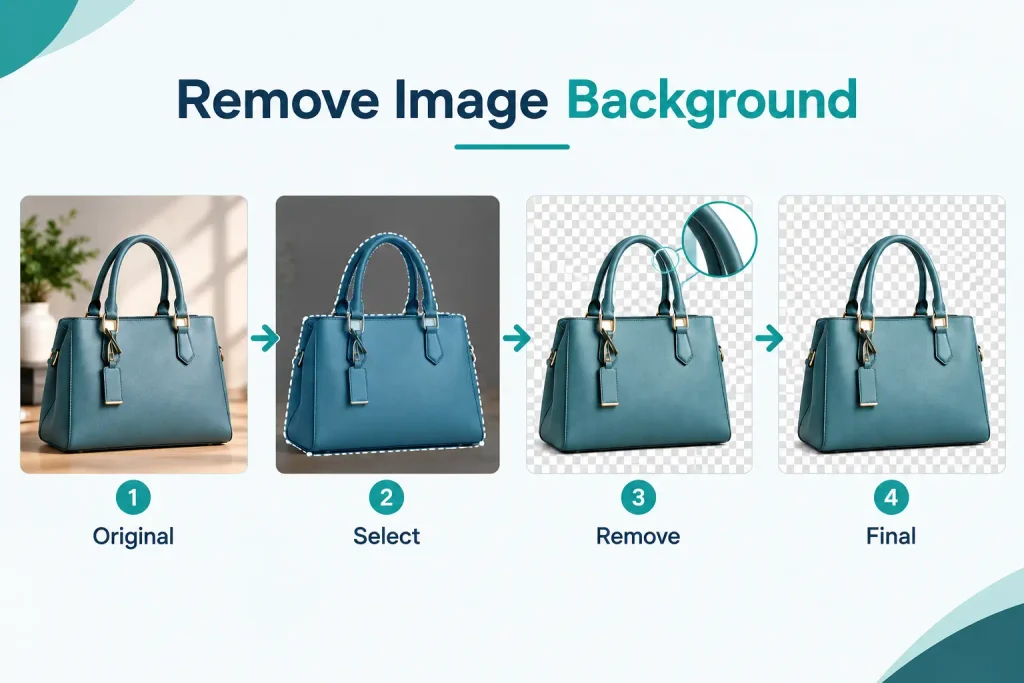
How to Remove an Image Background
The general process is similar no matter which method you choose.
- Choose a suitable image. A clear, well-lit photo with good contrast between the subject and the background is easier to work with than a blurry or low-resolution one.
- Select a background removal method. This might be an online tool, an AI-based tool, manual editing software, or a professional editor.
- Separate the subject from the background. This is the core step, whether it happens automatically or by hand.
- Refine the edges. Automatic tools often leave rough or slightly inaccurate edges around hair, fur, or fine details that need a second pass.
- Check fine details. Zoom in on areas like fingers, jewelry, or thin objects to confirm nothing important was removed by mistake.
- Decide whether shadows should remain. A soft shadow can make a product look more natural; other times it needs to go along with the background.
- Choose the appropriate output format. PNG is the standard choice when the background needs to be gone rather than replaced with a solid color.
- Review the final image. Look at it against a few different backgrounds to confirm the edges hold up.
- Save and export the finished file at the resolution and dimensions you actually need.
Ways to Remove an Image Background
Using an Online Background Removal Tool
Online background removal tools let you upload a photo and receive a processed version within seconds. Most of these tools detect the main subject automatically and remove everything else.
They work well for:
- Simple photos with a clear subject and a plain or uncluttered background
- Single product shots where speed matters more than perfect precision
- Quick edits for social media or informal use
Their limitations show up on complex images: fine hair, semi-transparent objects, or backgrounds that are similar in color to the subject can confuse the detection, leaving rough edges or missing details. Choose an online tool for straightforward images, and expect to do some manual cleanup on anything more complicated.
Using AI Background Removal
AI background removal uses a model trained to detect the edges of a subject automatically. It can process an image in seconds and handles many everyday photos well, especially when the subject is clearly separated from its background.
AI does best with:
- Single, clearly defined subjects
- Consistent lighting
- Reasonable contrast between subject and background
AI struggles more with fine hair strands, fur, lace, glass, or reflective surfaces, and it does not always produce a clean result on the first attempt. For anything client-facing or used at scale, a short human review after AI processing catches the edge cases that automatic detection misses.
Using Photoshop or Manual Editing
Manual editing gives the most control, which matters for detailed or complex images. Common tools include:
- Selection tools such as the Quick Selection or Object Selection tool, useful for subjects with clear edges
- The Pen Tool, used to draw a precise path around a subject for a clean, exact cutout
- Layer masks, which let you hide or reveal parts of an image without permanently deleting pixels
- Clipping paths, a defined outline used to separate a subject from its background, common in product photography
Manual editing takes more time than an automatic tool, but it handles hair, fur, jewelry, and other fine details far more reliably. It is the right choice when precision matters more than speed.
Hiring a Professional Image Editing Service
A professional editing service makes sense in specific situations:
- Large volumes of images, such as an entire product catalog
- Repeated editing needs on a regular schedule
- Subjects with difficult details like fine hair, fur, or reflective materials
- A need for consistent results across every image in a set
- Limited internal time or editing resources on your team
Professional editors combine manual technique with quality control steps, which matters when every image in a catalog needs to look the same.
How to Remove a White Background From an Image
A white background is one of the more common cases, especially for product photography, but it is not always as simple as it looks. Problems that come up include:
- White products against a white background, where the edges of the product are hard to detect
- Soft shadows that blend into the white area and get accidentally removed
- Low contrast between the subject and the background, which confuses automatic detection
- A white or light colored outline (a halo) left around the subject after removal
To get a clean result, look closely at the edges after processing, especially around curves and corners, and check whether any shadow you wanted to keep survived the process. If a halo remains, a small edge refinement pass usually fixes it.
How to Create a PNG Without a Background
PNG is the standard file format for an image where the background needs to be gone rather than replaced with a solid color. Unlike JPG, which always fills every pixel with a color, PNG supports an alpha channel, which is what allows part of the image to display as transparent rather than a solid fill.
To confirm a background has actually been removed:
- Open the file in an image viewer that shows a checkerboard pattern behind an image with no background, which confirms the empty area is real
- Place the image over a colored background to see if the edges look natural
- Avoid saving the final file as JPG, since JPG cannot preserve an image with the background removed and will fill the empty area with white or another solid color
Images That Need More Careful Background Removal
Some images are simply harder to process correctly, whether by automatic tools or by hand:
- Hair and fur, where individual strands are easy to lose or blur together
- Jewelry, which often has fine detail and reflective surfaces
- Glass and other reflective objects, which can pick up colors and shapes from the original background
- Thin objects such as wires or thin fabric edges
- Shadows, which need a deliberate decision on whether to keep or remove
- Semi-transparent objects, where the subject itself lets some background show through
- Low-resolution photos, which give an editing tool less detail to work with
- Complex backgrounds with multiple colors or patterns
- Foregrounds and backgrounds with similar colors, which reduce the contrast a tool needs to detect an edge
These cases usually need manual review, even after an AI or online tool has done the first pass.
Image Background Removal for Ecommerce

Ecommerce relies on background removal more than almost any other use case. Product listings, catalogs, and marketplace pages usually require a specific, consistent background (often plain white) across every image.
Practical considerations for ecommerce image sets include:
- Consistent background color and style across the entire catalog
- Matching image dimensions so thumbnails and listing pages display evenly
- Accurate cutouts that do not clip product edges or leave background fragments
- A workflow that can handle repeated batches of new product photos as inventory changes
Getting this right at scale usually means either a dependable tool for simple products or manual and professional editing for anything with fine detail.
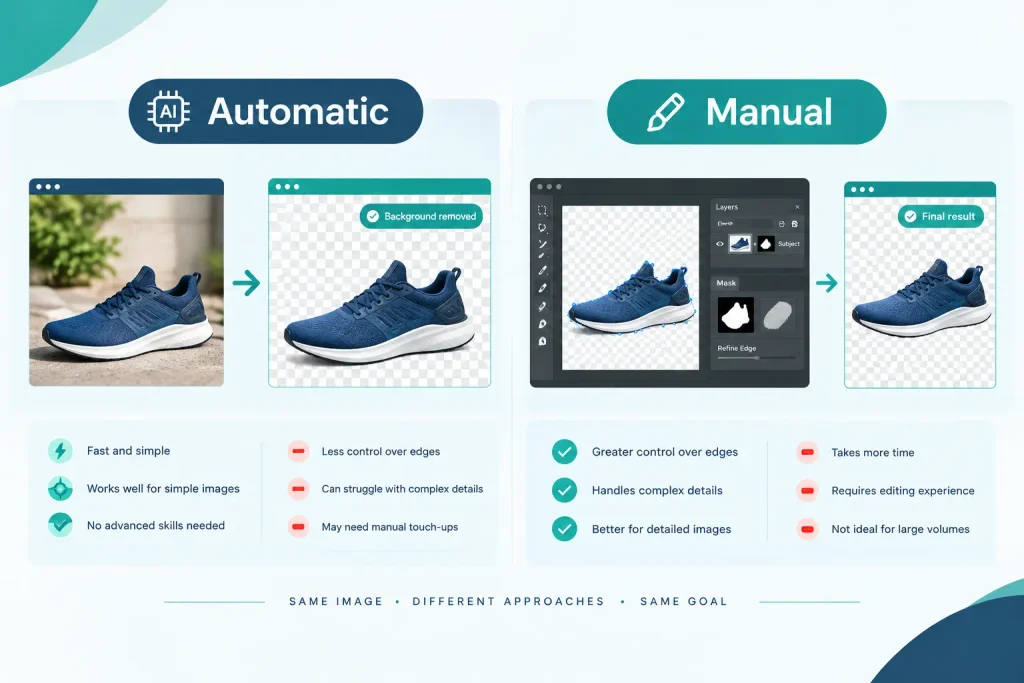
Automatic vs Manual Background Removal
| Factor | Automatic (online tool or AI) | Manual editing |
| Speed | Fast, often seconds per image | Slower, minutes per image depending on detail |
| Editing control | Limited | High |
| Simple images | Works well | Works well, but slower than needed |
| Complex images (hair, fur, glass) | Often struggles | Handles detail more reliably |
| Fine detail preservation | Inconsistent | Consistent with careful work |
| Large volumes | Efficient for simple, similar images | Requires more time per image |
| Consistency across a set | Can vary image to image | Easier to standardize with a defined process |
| Human review needed | Usually yes, for anything client-facing | Built into the process |
Neither method is universally better. Simple, high-volume images with plain backgrounds are usually a good fit for automatic tools. Detailed or client-facing images, especially anything involving hair, fur, jewelry, or reflective surfaces, tend to need manual work or a professional editor.
Common Background Removal Mistakes
- Rough or jagged edges around the subject
- A visible white or colored halo left after removal
- Missing small details, especially in hair or fur
- Cutting off strands of hair or fur that should have stayed
- Removing shadows that made the image look natural
- Leaving small fragments of the old background behind
- Poor cropping that cuts off part of the subject
- Starting from a low-resolution source image
- Saving the final file in the wrong format (JPG instead of PNG)
- Inconsistent dimensions across a set of images
- Excessive sharpening that makes edges look artificial
- Skipping a final quality check before publishing the image
How to Prepare an Image Before Background Removal
A better starting photo makes every method work better. Before removing a background, it helps to:
- Start with the highest resolution image you have available
- Avoid heavily compressed files that have already lost fine detail
- Photograph or select images with a clear, well defined subject
- Decide the output size you actually need before editing
- Decide in advance whether shadows should remain
- Confirm the required file format ahead of time
- Identify any difficult areas (hair, glass, thin edges) before editing begins, so they get extra attention
How to Check a Background-Removed Image
Before publishing or sending a background-removed image, run through this checklist:
Subject edges are clean. Hair and fine details are preserved. No unwanted background fragments remain. No visible white or colored halo remains. Important shadows have been handled correctly. Image dimensions are correct. Image quality is suitable for its intended use. File format is correct. The final image looks natural against different backgrounds.
Professional Image Background Removal Services
Once you understand how background removal works, the next question is whether to do it yourself or bring in outside help. Businesses commonly outsource this kind of work when they need:
- Product image editing for a growing catalog
- Ecommerce image editing across multiple listings or marketplaces
- Image background removal at volume
- Image cutouts for marketing or web use
- Image retouching alongside background work
- Bulk image editing on a recurring schedule
- Website image preparation for new pages or product launches
- Marketing image editing for ads, banners, and social graphics
Softage Solutions is a digital marketing, SEO, and web services company that also supports image editing needs connected to these areas, such as preparing product and website images as part of a broader web or marketing project.
FAQ
How do I remove an image background?
Use an online tool, an AI-based tool, manual editing software, or a professional editor. Upload or open the image, separate the subject from the background, refine the edges, and export the result, typically as a PNG.
Can I remove an image background online?
Yes. Many online tools let you upload a photo and automatically remove the background within seconds. They work best on simple images with a clear subject and a plain background.
How do I remove a white background from a picture?
Use an automatic tool for a quick result, then check the edges closely, since white backgrounds often leave a faint halo or lose soft shadows. Manual refinement usually fixes any leftover issues.
How can I create a PNG without a background?
Export the finished cutout as a PNG file, which supports an alpha channel that allows part of the image to display as transparent rather than a solid color. Confirm the result by viewing it over a checkerboard pattern or a colored background.
Can AI remove image backgrounds?
Yes. AI tools detect the subject automatically and remove the background in seconds. They work well on straightforward photos but often need a manual touch-up on fine hair, fur, or reflective surfaces.
Is Photoshop required to remove a background?
No. Online tools and AI-based tools can remove backgrounds without Photoshop. Photoshop and similar software become more useful when an image needs precise manual control, such as detailed selections or a hand-drawn clipping path.
When should I use manual background removal?
Use manual editing when the image includes fine detail like hair, fur, jewelry, or glass, or when the final result needs to be exact and consistent, such as for a professional catalog.
Can backgrounds be removed from product photos?
Yes. This is one of the most common uses of background removal, especially for ecommerce listings, marketplaces, and product catalogs that require a consistent background across every image.
How do you remove a background from hair or fur?
Hair and fur usually need manual editing or careful review after an automatic pass, since individual strands are easy for automatic tools to blur or miss. Layer masks and edge refinement tools help preserve these details.
Why does a white outline remain after background removal?
This halo effect happens when leftover pixels from the original background stay along the edge of the subject, often because of low contrast between the subject and the background. A manual edge refinement pass usually removes it.
What is the difference between background removal and a clipping path?
Background removal is the general process of separating a subject from its background. A clipping path is a specific technique that uses a precise, hand-drawn outline to define exactly where that separation happens, commonly used in product photography for clean, exact edges.
Can image backgrounds be removed in bulk?
Yes. Many tools support batch processing for large sets of similar images, and professional editing services regularly handle bulk background removal for ecommerce catalogs and marketing image sets.